當我們一開始安裝SQL server時,系統會幫我們預設一組帳號,即最高管理員帳號。
但當我們實際開發時,勢必不會使用這組帳號,因為太過危險了。
他能夠刪除資料庫、表,哪天被入侵、盜用時整個資料庫都會有危險。
所以,在此要介紹一下新增自訂權限的管理員。
新增自訂的資料庫管理員
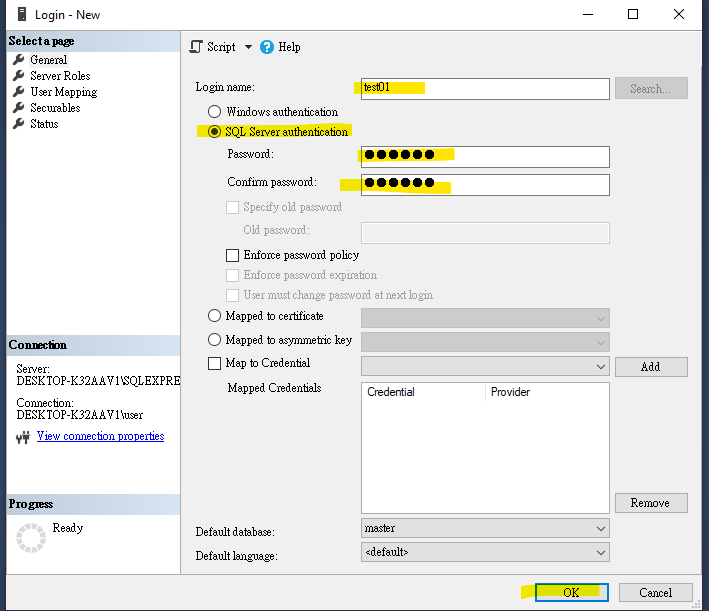
1.新增登入

2.填入帳、密資料
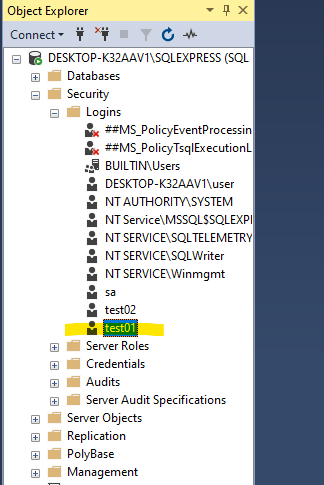
3.可以在左方看到剛新增的管理員
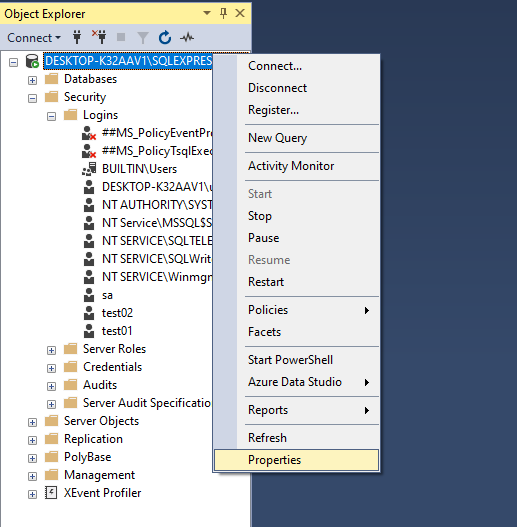
4.屬性
5.使用混和模式登入
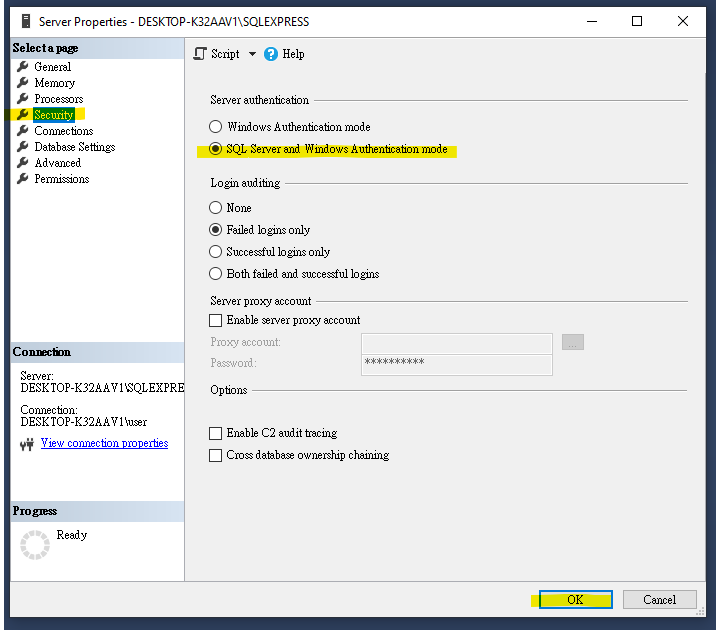
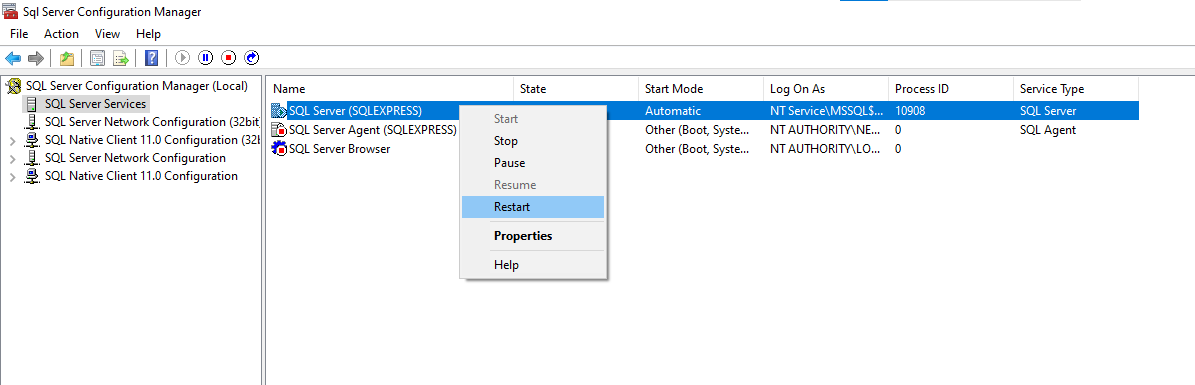
6.開啟SQL Server 2019 Configuration Manager,重啟SQL server。
注意,重新開機是沒效的,一定要用這種方法重新運作SQL server
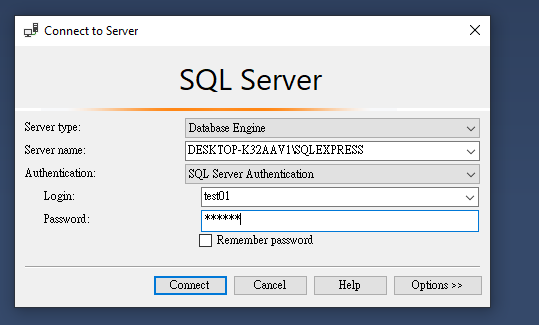
7.登入帳號
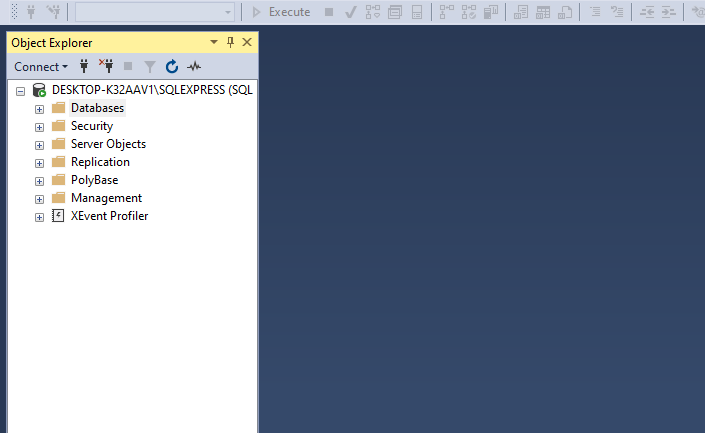
8.成功登入
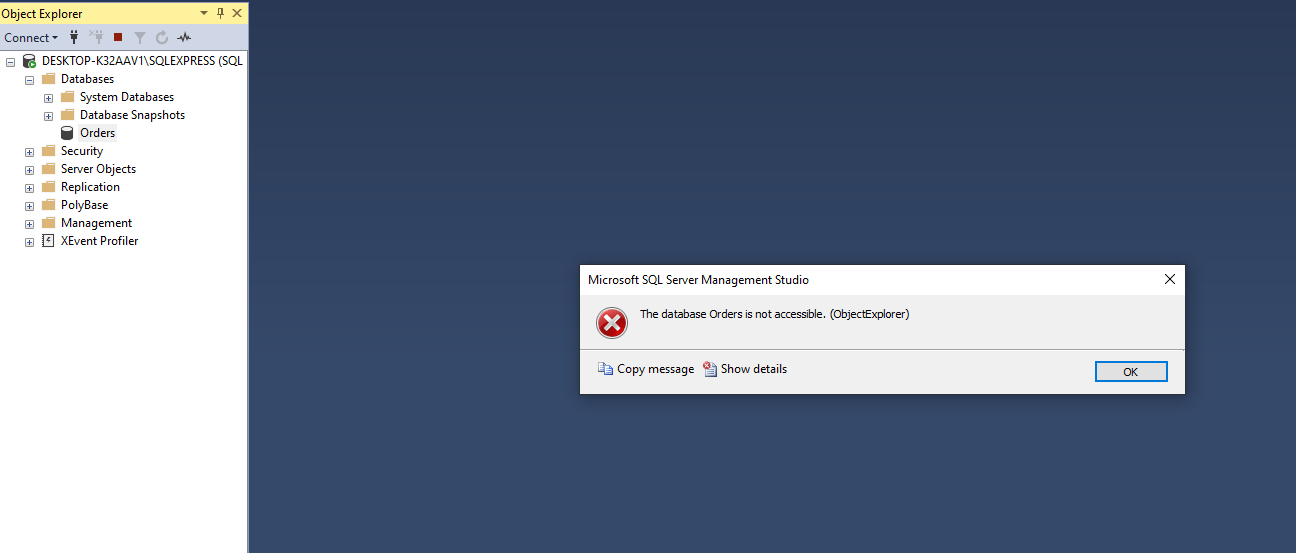
9.登入後選擇原本資料庫會發現沒有權限
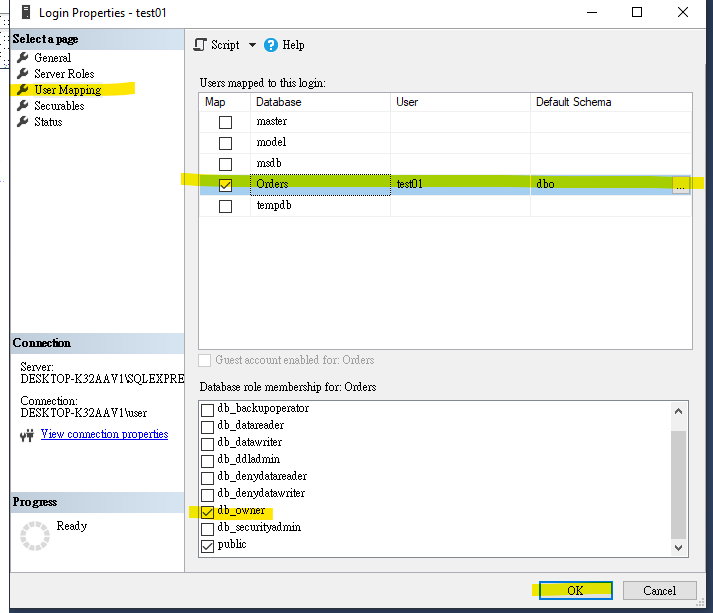
10.回去編輯test01帳號,把Orders的db_owner勾起來即可。
結論
這樣一來就能限制某些帳號管理特定資料庫了。