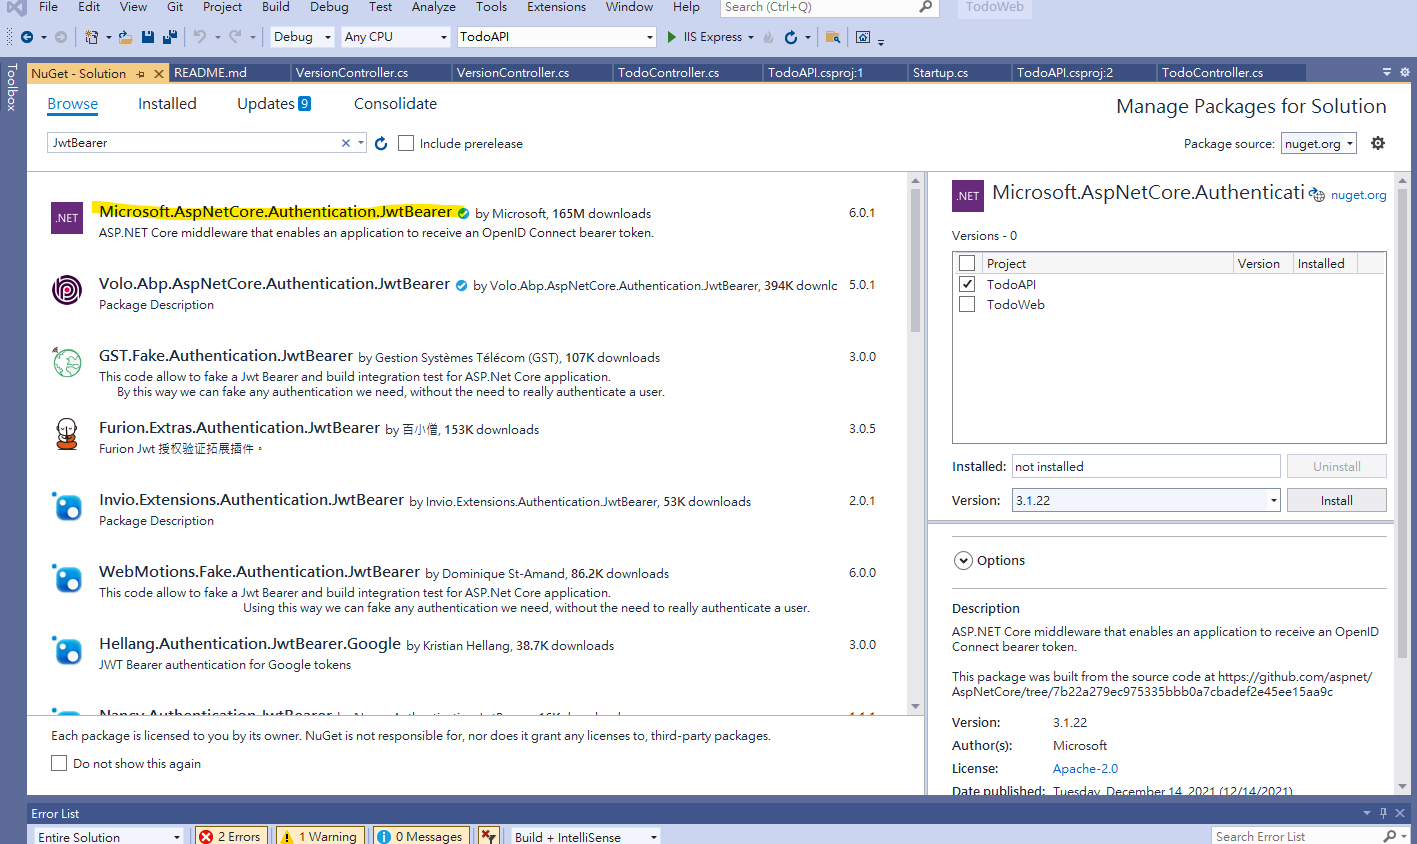
而這回主要探討的是Token-Based驗證,也就是API常用的JWT (Json Web Token)。
什麼是JWT
JSON Web Token (JWT) is a proposed Internet standard for creating data with optional signature and/or optional encryption whose payload holds JSON that asserts some number of claims.
為JSON Web Token,是一個建議的網路標準,用來建立簽名,且在其中可以視需求加入自訂的JSON內容。
namespace ApiVersioningSample { using System; using System.Linq;
using Microsoft.AspNetCore.Mvc.ApiExplorer; using Microsoft.Extensions.DependencyInjection; using Microsoft.Extensions.Options; using Microsoft.OpenApi.Models;
using Swashbuckle.AspNetCore.SwaggerGen;
/// <summary> /// Configures the Swagger generation options. /// </summary> /// <remarks> /// <para> /// This allows API versioning to define a Swagger document per API version after the /// <see cref="IApiVersionDescriptionProvider" /> service has been resolved from the service container. /// </para> /// <para>Taken from https://github.com/microsoft/aspnet-api-versioning.</para> /// </remarks> public class ConfigureSwaggerOptions : IConfigureOptions<SwaggerGenOptions> { #region member vars
/// <summary> /// Initializes a new instance of the <see cref="ConfigureSwaggerOptions" /> class. /// </summary> /// <param name="provider"> /// The <see cref="IApiVersionDescriptionProvider">provider</see> used to generate Swagger /// documents. /// </param> public ConfigureSwaggerOptions(IApiVersionDescriptionProvider provider) { _provider = provider; }
#endregion
#region explicit interfaces
/// <inheritdoc /> public void Configure(SwaggerGenOptions options) { // add a swagger document for each discovered API version // note: you might choose to skip or document deprecated API versions differently foreach (var description in _provider.ApiVersionDescriptions) { options.SwaggerDoc(description.GroupName, CreateInfoForApiVersion(description)); } }
#endregion
#region methods
/// <summary> /// Internal implementation for building the Swagger basic config. /// </summary> /// <param name="description">The description object containing the.</param> /// <returns>The generated Open API info.</returns> private static OpenApiInfo CreateInfoForApiVersion(ApiVersionDescription description) { var info = new OpenApiInfo { Title = "Sample API", Version = description.ApiVersion.ToString(), Description = @"<p>Sample API with versioning including Swagger.</p><p>Partly taken from <a href=""https://github.com/microsoft/aspnet-api-versioning"">this repository</a>.</p>", Contact = new OpenApiContact { Name = "Yu Hsiang", } }; if (description.IsDeprecated) { info.Description += @"<p><strong><span style=""color:white;background-color:red"">VERSION IS DEPRECATED</span></strong></p>"; } return info; }
using Microsoft.AspNetCore.Builder; using Microsoft.AspNetCore.Hosting; using Microsoft.AspNetCore.HttpsPolicy; using Microsoft.AspNetCore.Mvc; using Microsoft.Extensions.Configuration; using Microsoft.Extensions.DependencyInjection; using Microsoft.Extensions.Hosting; using Microsoft.Extensions.Logging; using System; using System.Collections.Generic; using System.Linq; using System.Threading.Tasks; using Microsoft.EntityFrameworkCore; using TodoAPI.Models; using Microsoft.OpenApi.Models; using Swashbuckle.AspNetCore.SwaggerGen; using Microsoft.Extensions.Options; using ApiVersioningSample; using Microsoft.AspNetCore.Mvc.ApiExplorer;
namespace TodoAPI { public class Startup { public Startup(IConfiguration configuration) { Configuration = configuration; }
public IConfiguration Configuration { get; }
// This method gets called by the runtime. Use this method to add services to the container. public void ConfigureServices(IServiceCollection services) { services.AddControllers(); // 資料庫配置 var connection = @"Server=.\SQLExpress;Database=TodoDB;Trusted_Connection=True;ConnectRetryCount=0"; services.AddDbContext<TodoDBContext>(options => options.UseSqlServer(connection));
// 啟用API版控功能 services.AddApiVersioning( options => { // reporting api versions will return the headers "api-supported-versions" and "api-deprecated-versions" options.ReportApiVersions = true; });
// swagger 配置 services.AddVersionedApiExplorer( options => { // add the versioned api explorer, which also adds IApiVersionDescriptionProvider service // note: the specified format code will format the version as "'v'major[.minor][-status]" options.GroupNameFormat = "'v'VVV"; // note: this option is only necessary when versioning by url segment. the SubstitutionFormat // can also be used to control the format of the API version in route templates options.SubstituteApiVersionInUrl = true; }); services.AddTransient<IConfigureOptions<SwaggerGenOptions>, ConfigureSwaggerOptions>(); services.AddSwaggerGen();
}
// This method gets called by the runtime. Use this method to configure the HTTP request pipeline. public void Configure(IApplicationBuilder app, IWebHostEnvironment env, IApiVersionDescriptionProvider provider) { if (env.IsDevelopment()) { app.UseDeveloperExceptionPage(); }
app.UseHttpsRedirection();
app.UseRouting();
app.UseAuthorization(); // swagger 配置 app.UseSwagger(); app.UseSwaggerUI( options => { // build a swagger endpoint for each discovered API version foreach (var description in provider.ApiVersionDescriptions) { options.SwaggerEndpoint($"/swagger/{description.GroupName}/swagger.json", description.GroupName.ToUpperInvariant()); } });
// This method gets called by the runtime. Use this method to add services to the container. public void ConfigureServices(IServiceCollection services) { services.AddControllers(); // 資料庫配置 var connection = @"Server=.\SQLExpress;Database=TodoDB;Trusted_Connection=True;ConnectRetryCount=0"; services.AddDbContext<TodoDBContext>(options => options.UseSqlServer(connection)); // 啟用API版控功能 services.AddApiVersioning();
}
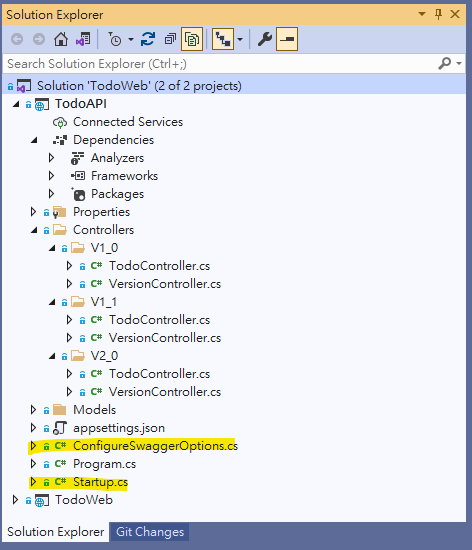
3.以資料夾分版本層,就是把原本的Controller複製至版本資料夾
如1.0版: ~/Controllers/V1/VersionController.cs
1 2 3 4 5 6 7 8 9 10 11 12 13 14 15 16 17 18
using System.Collections.Generic; using Microsoft.AspNetCore.Mvc;
namespace TodoAPI.Controllers.V1 { [ApiVersion("1.0")] [Route("api/v{version:apiVersion}/[controller]")] [ApiController] public class VersionController : ControllerBase { [HttpGet] public IEnumerable<string> Get() { return new string[] { "api v1" }; } } }
如2.0版:
~/Controllers/V2/VersionController.cs
1 2 3 4 5 6 7 8 9 10 11 12 13 14 15 16 17
using System.Collections.Generic;
using Microsoft.AspNetCore.Mvc;

namespace TodoAPI.Controllers.V2
{
    [ApiVersion("2.0")]
    [Route("api/v{version:apiVersion}/[controller]")]
    [ApiController]
    public class VersionController : ControllerBase
    {
        [HttpGet]
        public IEnumerable<string> Get()
        {
            return new string[] { "api v2" };
        }
    }
}
// This method gets called by the runtime. Use this method to add services to the container.
    public void ConfigureServices(IServiceCollection services)
    {
        services.AddControllers();
        // 資料庫配置
        var connection = @"Server=.\SQLExpress;Database=TodoDB;Trusted_Connection=True;ConnectRetryCount=0";
        services.AddDbContext<TodoDBContext>(options => options.UseSqlServer(connection));
    }
using System.Collections.Generic; using System.Linq; using System.Threading.Tasks; using Microsoft.AspNetCore.Mvc; using Microsoft.EntityFrameworkCore; using TodoAPI.Models;
namespace TodoAPI.Controllers {
[Route("api/[controller]")] [ApiController] public class TodoController : ControllerBase { private readonly TodoDBContext _context; public TodoController(TodoDBContext context) { _context = context; } [HttpGet] public async Task<ActionResult<IEnumerable<Todo>>> GetTodos() { return await _context.Todos.Where(x=>x.IsDeleted != 1).ToListAsync(); }
[HttpGet("{id}")] public async Task<ActionResult<Todo>> GetTodo(int id) { var obj = await _context.Todos.FindAsync(id);
if (obj.IsDeleted == 1) { return NotFound(); }
return obj; }
[HttpPut("{id}")] public async Task<ActionResult<Todo>> PutTodo(int id, Todo newObj) { if (id != newObj.Id) { return BadRequest(); }
Representational state transfer (REST) is a software architectural style that was created to guide the design and development of the architecture for the World Wide Web.REST defines a set of constraints for how the architecture of an Internet-scale distributed hypermedia system, such as the Web, should behave.The REST architectural style emphasises the scalability of interactions between components, uniform interfaces, independent deployment of components, and the creation of a layered architecture to facilitate caching components to reduce user-perceived latency, enforce security, and encapsulate legacy systems.
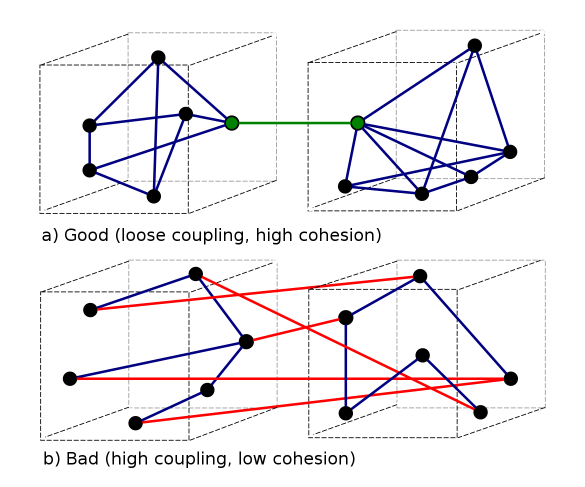
The REST architectural style is designed for network-based applications, specifically client-server applications. But more than that, it is designed for Internet-scale usage, so the coupling between the user agent (client) and the origin server must be as lightweight (loose) as possible to facilitate large-scale adoption.
耦合度(Coupling):coupling is the degree of interdependence between software modules。Coupling is usually contrasted with cohesion. Low coupling often correlates with high cohesion, 耦合度表示模組間相互依賴的程度。 耦合通常與內聚相關,低耦合通常與高內聚相關。 如下的(a)就是比較好的結構,盡量封裝好,開簡單的接口出來,但現實情況下不可能做到理想。 以我自身經驗,曾維護那種(b)的狀況,要搞懂A還得先去搞懂B在幹嘛,追了8層之多。此外,精簡的程式碼不等於高內聚,有時更多的是忍者程式碼(Ninja Code)。
RESTful 6個限制
主從式架構(Client–server architecture) The client-server design pattern enforces the principle of separation of concerns 主從式設計模式強制關注點分離的原則 separating the user interface concerns from the data storage concerns. Portability of the user interface is thus improved. 分離用戶介面與資料儲存問題。用戶介面的可攜性因此被改善。
無狀態(Statelessness) In computing, a stateless protocol is a communications protocol in which no session information is retained by the receiver, usually a server. Relevant session data is sent to the receiver by the client in such a way that every packet of information transferred can be understood in isolation, without context information from previous packets in the session. 無狀態是種溝通的協定,沒有session被接收者保留,通常接收者是伺服器端。客戶端將資訊送給接收者,每個資訊可以獨立離解,不用藉由理解上下文才能知道訊息。
快取(Cacheability) As on the World Wide Web, clients and intermediaries can cache responses. Responses must, implicitly or explicitly, define themselves as either cacheable or non-cacheable to prevent clients from providing stale or inappropriate data in response to further requests. Well-managed caching partially or completely eliminates some client–server interactions, further improving scalability and performance. 在網路上客戶、中間人可以快取結果,可自行定義是否該緩存的資料。良好的快取能改善效能。
分層系統(Layered system) A client cannot ordinarily tell whether it is connected directly to the end server or to an intermediary along the way.Adding security as a separate layer enforces security policies. 客戶端不能判斷是連結到終端還是中介。能增加安全性在特別的層級強制特定的安全政策。
按需求編碼(Code on demand) 可選 Servers can temporarily extend or customize the functionality of a client by transferring executable code: for example, compiled components such as Java applets, or client-side scripts such as JavaScript. 伺服器端可臨時擴充或可執行代碼給客戶端,如:客戶端代碼JavaScript、編譯後元件Java小程式。
統一接口(Uniform interface) The uniform interface constraint is fundamental to the design of any RESTful system 統一接口約束是restful系統的基礎。 為以下四點:
請求中包含資源的 ID(Resource identification in requests) 求中包含了各種獨立資源的標識,例如,在Web服務中的URI。資源本身和傳送給客戶端的標識是獨立。例如,伺服器可以將自身的資料庫資訊以HTML、XML或者JSON的方式傳送給客戶端,但是這些可能都不是伺服器的內部記錄方式。
資源通過標識來操作(Resource manipulation through representations) 當客戶端擁有一個資源的標識,包括附帶的元資料,則它就有足夠的資訊來刪除這個資源。
用超媒體驅動應用狀態(Hypermedia as the engine of application state (HATEOAS) 同使用者存取Web伺服器的Home頁面相似,當一個 REST 客戶端存取了最初的REST應用的URI之後,REST 客戶端應該可以使用伺服器端提供的連結,動態的發現所有的可用的資源和可執行的操作。
RESTful的權限規劃問題,以資源式不好管理 後台通常以Role Based Access Control (RBAC) 去規劃權限。 而RESTful是以資源(Resources)為底,這時判斷哪個API具有某權限就必須特別判斷或添加。如沒限制好可能造成資料多給的漏洞。 如果是我會以敏感資訊為大方向去限制。
using Microsoft.AspNetCore.Mvc; using Microsoft.Extensions.Logging; using MVC_With_API.Models; using System; using System.Collections.Generic; using System.Diagnostics; using System.Linq; using System.Threading.Tasks;
namespace MVC_With_API.Controllers { public class HomeController : Controller { private readonly ILogger<HomeController> _logger;
public HomeController(ILogger<HomeController> logger) { _logger = logger; }
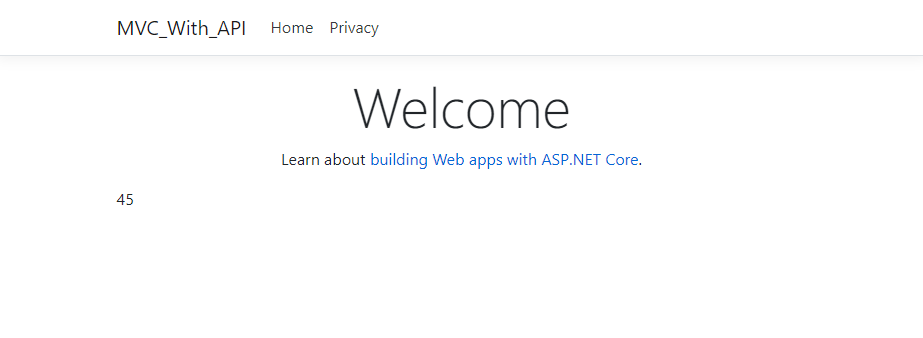
<div class="text-center"> <h1 class="display-4">Welcome</h1> <p>Learn about <a href="https://docs.microsoft.com/aspnet/core">building Web apps with ASP.NET Core</a>.</p> </div>
using System; using System.Collections.Generic; using System.Linq; using System.Threading.Tasks; using Microsoft.EntityFrameworkCore;
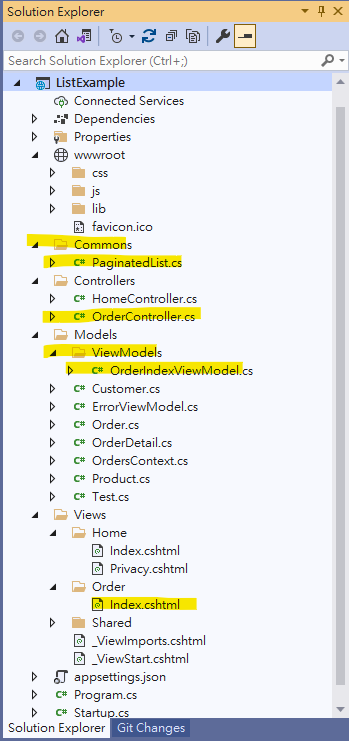
namespace ListExample { public class PaginatedList<T> : List<T> { public int PageIndex { get; private set; } public int TotalPages { get; private set; }
public PaginatedList(List<T> items, int count, int pageIndex, int pageSize) { PageIndex = pageIndex; TotalPages = (int)Math.Ceiling(count / (double)pageSize);
this.AddRange(items); }
public bool HasPreviousPage { get { return (PageIndex > 1); } }
public bool HasNextPage { get { return (PageIndex < TotalPages); } }
public static async Task<PaginatedList<T>> CreateAsync(IQueryable<T> source, int pageIndex, int pageSize) { var count = await source.CountAsync(); var items = await source.Skip((pageIndex - 1) * pageSize).Take(pageSize).ToListAsync(); return new PaginatedList<T>(items, count, pageIndex, pageSize); } } }
using System; using System.ComponentModel.DataAnnotations; namespace ListExample.Models.ViewModels { public class OrderIndexViewModel { [Display(Name = "訂單編號")]
public string Number { get; set; } [Display(Name = "寄送日期")]
public DateTime ShippingDate { get; set; } [Display(Name = "寄送地址")]
public string ShippingAddress { get; set; } [Display(Name = "客戶簽收")]
public string CustomerSignature { get; set; } [Display(Name = "客戶編號")]
public string CustomerNumber { get; set; } [Display(Name = "總額")]
public decimal Total { get; set; } [Display(Name = "客戶名稱")]
public string CustomerName { get; set; } [Display(Name = "客戶電話")]
using ListExample.Models; using Microsoft.AspNetCore.Mvc; using Microsoft.EntityFrameworkCore; using System; using System.Threading.Tasks; using System.Linq; using ListExample.Models.ViewModels;
namespace ListExample.Controllers { public class OrderController : Controller {
private readonly OrdersContext _context;
public OrderController(OrdersContext context) { _context = context; } public async Task<IActionResult> Index( string sortOrder, string currentFilterCustomer, string currentFilterNumber, string searchStringCustomer, string searchStringNumber, int? goToPageNumber, int pageSize, int? pageNumber) { // 1.搜尋邏輯 var query = from a in _context.Orders join b in _context.Customers on a.CustomerNumber equals b.Number into result1 from ab in result1.DefaultIfEmpty() select new OrderIndexViewModel { Number = a.Number, ShippingAddress = a.ShippingAddress, ShippingDate = a.ShippingDate, CustomerSignature = a.CustomerSignature, Total = a.Total, CustomerNumber = a.CustomerNumber, CustomerName = ab.Name, CustomerTel = ab.Tel };
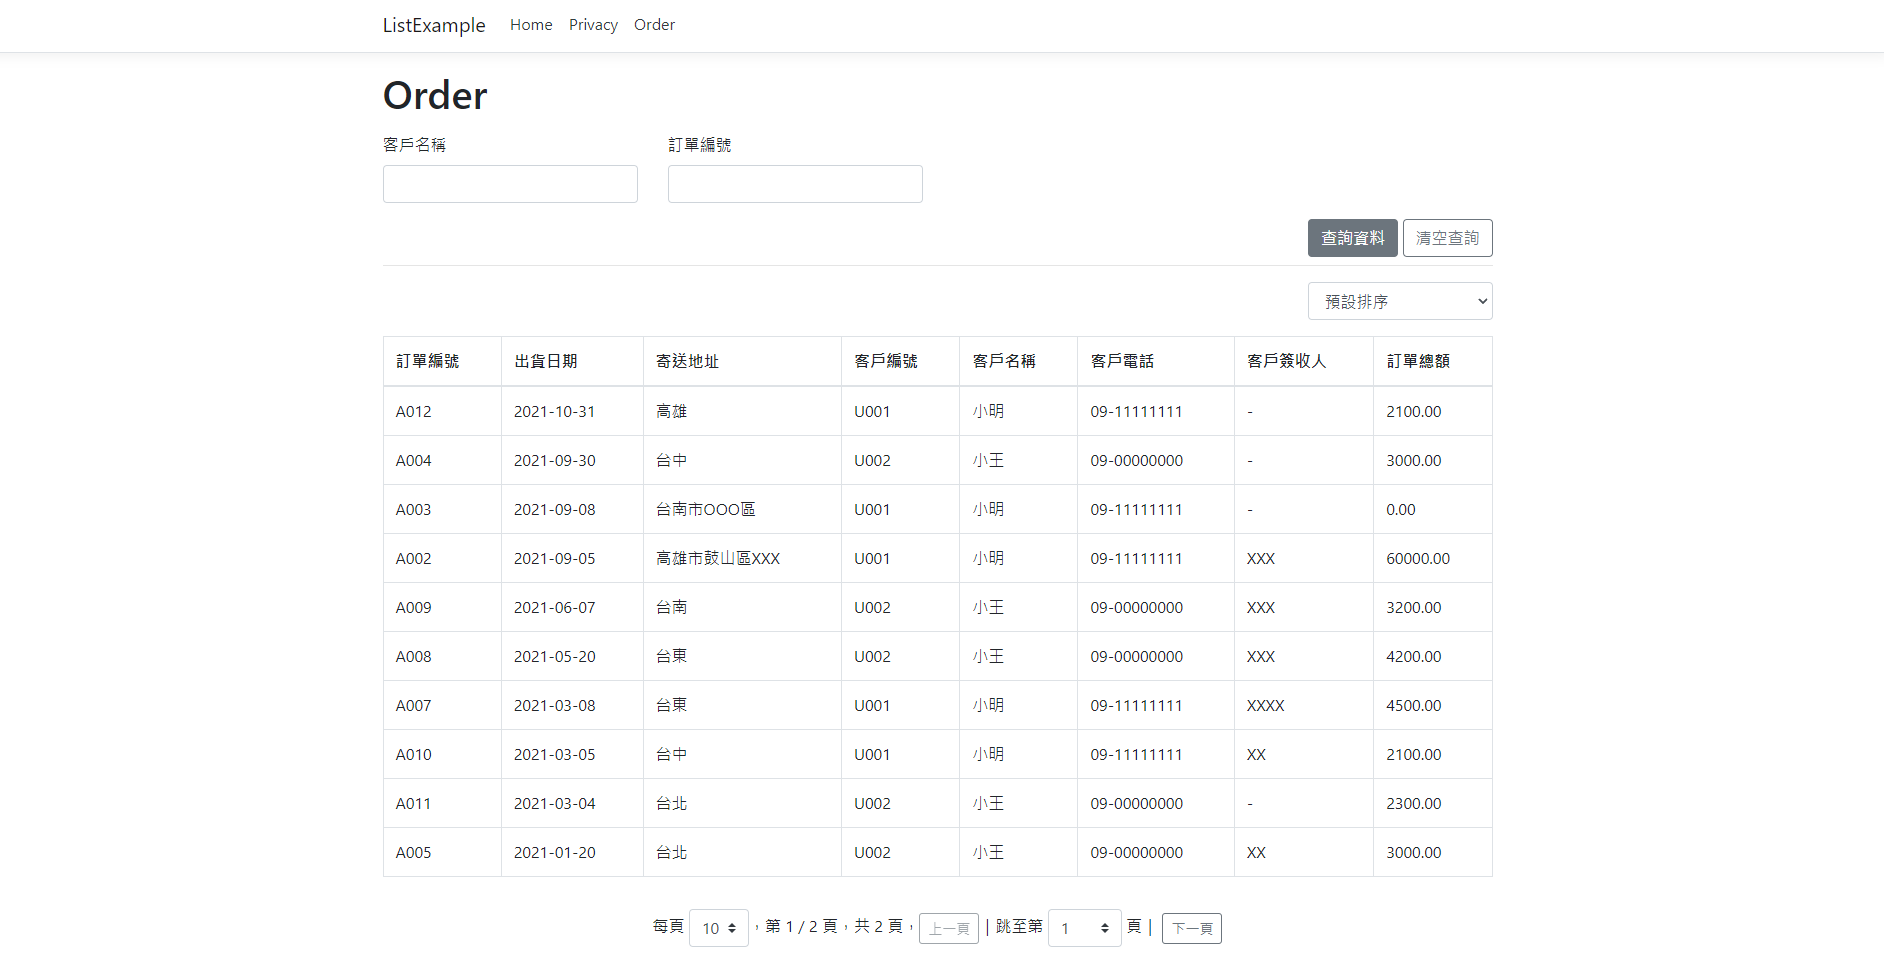
@model PaginatedList<ListExample.Models.ViewModels.OrderIndexViewModel> @* For more information on enabling MVC for empty projects, visit https://go.microsoft.com/fwlink/?LinkID=397860 *@ @{ } <h1>Order</h1>